Thursday, January 10, 2013

Cream Cheese Cut Out Cookies and Royal Icing

 I know that Christmas is over, but these cookies are still relevant.  You still have Valentines Day and Easter coming up and there are some great designs for these two holidays. The first subject I want to talk about is Glazing Sugar and King Arthur Flour's White Icing Mix.
I'm not sure how many of you have attempted royal icing, but I'm sure everyone feels the most frustrating part is the drying time.  I've tried several recipes including Martha's and it usually takes about 24 hours for that base icing to dry, uncovered!  Ever wonder why those cookies that are so beautifully decorated are dry and stale tasting? Because they had to sit out for so long.  Well, I found the solution-Glazing Sugar!

Before Christmas I was stalling on doing my snowflake cookies and I kept coming back to KAF's White Icing Mix.  I try to avoid box mixes if I can make the same thing from scratch which saves you lots of money.  Plus, I can't find mos of KAF's box mixes locally so on top of that there is the cost of shipping.  But the reviews kept raving about the short drying time.  Why was theirs so fast? I looked up the ingredients and the one thing that caught my eye was the glazing sugar so I did a search to see if they carried glazing sugar, which they did.  What I found out is that the confectioner's or powdered sugar you get in the store contains starch which really slows down the drying time and combats the hardening of the icing.  Ever try to do a white glaze on top of your sweet breads only to have it gum up and become gloppy?  It's the starch!

So excitedly I ordered the glazing sugar and the icing mix.  Didn't have much time so didn't want to take any chances.  The icing mix was awesome but I do have to admit, I have yet to try the glazing sugar.  For once, I truly enjoyed decorating the cookies and it only took 3 hours for that first coat to dry!  3 versus 24?  I'm sold.  After that, I ordered 3 more boxes.  This box can be made into three different styles of icing:  classic white icing glaze, royal icing and cookie frosting.  Now, it has you mixing the whole box with 1/4 cup of water.  I wasn't sure how much that would make so I started out with half the box so I halved the water which was not enough.  I increased it to 1/4 cup and that was perfect.  On a side note, I live in Las Vegas where it's pretty dry in the summer so you can imagine how dry it was around Christmas, so proceed carefully when adding more water.

I followed the directions for royal icing and I did not have to do a separate batch for piping and flooding.  I simply outlined the area and added the icing to the center and spread using a toothpick.  3 hours later, I was ready to add to the design.  One thing I always do with my snowflakes is to luster the base coat.  This will give your icing a opalescent finish and really make any designs you do on top of that coat pop.  You can find them at your local cake shop or Michael's.  They come in many colors, but just make sure to read the label.  Some are not for consumption.  I bought a blue one and did not see the toxic label.

The bottles won't seem like much, but a little goes a long way.  Now all you need is a soft buffing brush which should be available at the same store.  To apply, tap a little into the lid and swirl the brush in it.  Tap excess into the lid and lightly swirl the luster dust onto the icing.  Now your cookie with practically glow!  
I earlier posted a recipe for Butter Cut Out Cookies and while it's a good one, the following is my favorite.  Funny thing is, the first time I tasted it was for Valentines Day!  Now I'm not much of a sugar cookie person, but these I instantly loved.  And the wonderful coworker was not one of those types who claimed it was a family secret or something like that.  If you're not a royal icing fan, this recipe does come with an almond frosting recipe that is very good.  Here you are:

Cream Cheese Cutout Cookies

 Ingredients:
 ·       1 cup butter       
·       8 oz. cream cheese, softened       
·       1 1/2 cups sugar
·       1 egg
·       1 tsp. vanilla      
·       1/2 tsp. almond extract
·       3 1/2 cups flour 
·       1 tsp. baking powder
·       Almond Frosting:     
·       2 cups sifted powdered sugar                 
·       2 tbsp. butter, softened        
·       1/4 tsp. almond extract        
·       4-5 tsp. milk
·       assorted candies for decoration                                 
Directions:

    In a mixer, beat softened butter and cream cheese until well combined.  Add sugar; beat until fluffy.  Add egg, vanilla and almond extract; beat well. 

    In small bowl, combine flour and baking powder.  Add dry ingredients to cream cheese mixture; beat until well mixed.      

    Divide dough in half.  Wrap each portion in plastic wrap and refrigerate for 1 1/2 hours. 

    Preheat oven to 375º. 

    Roll out dough, one half at a time, to 1/8″ thickness on lightly floured surface.  Cut out with cookie cutters.  Place 2″ apart on ungreased cookie sheets.  Bake 8-10 minutes or until edges are lightly browned.  Remove to wire racks to cool completely. 

    In small bowl, beat sifted powdered sugar, softened butter and almond extract until smooth.  For piping consistency, beat in milk.  For spreading consistency, add a little more milk.  If desired, tint with food coloring.

    Frost cookies with Almond Frosting and decorate with assorted candies, if desired.  

One of the ingredients is almond extract. If you are worried someone with a nut allergy eating these, you can omit the extract and just add a bit more vanilla.  I've done them without and they were still very good.  The almond just gives them a little something something.  

The directions are very simple, but make sure you do not skip the refrigeration portion.  This will help your cookies keep their shape and from becoming puffy.  Matter of fact, after I roll and cut them out, I place them on the baking sheet with parchment paper and refrigerate them again, but only for about 30 minutes.  This will give you very sharp cut outs! 

Now get on Pinterest and start searching for designs for Valentines and Easter!  Enjoy!

Sunday, January 6, 2013

Flaky Cheese Twists


Looking for an easy but elegant appetizer or bread?  These are it!  You are going to be amazed at how easy they are to make.  I've made traditional puff pastry and while I myself don't find it difficult, it can be time consuming.  The puff pastry for this recipe is  far from time consuming which is why it is called Fast and Easy Puff Pastry.  

This recipe has been featured on the King Arthur Flour web site during the holiday season.  I've been eyeing it, but just didn't get to it until after the holidays.  But this would be a beautiful accompaniment to your homemade Valentine's Dinner.  

First of all, you are going to make the puff pastry. Here's the recipe:

King Arthur Flour's Fast and Easy Puff Pastry
Ingredients:
 ·       2 cups (8 1/2 oz.) all-purpose flour
·       1/2 tsp. salt
·       1/2 tsp. baking powder
·       1 cup cold unsalted butter, cut into pats
·       1/2-3/4 cup (4-6 oz.) sour cream
Directions:

  Whisk together the flour, salt and baking powder.

    Add the butter, working it in to make a coarse/crumbly mixture.  Leave most of the butter in large, pea-sized pieces.

    Stir in the sour cream; the dough won't be cohesive.  Turn it out onto a floured work surface, and bring it together with a few quick kneads.

    Pat the dough into a rough log, and roll it into an 8x10" rectangle. 

    Dust both sides of the dough with flour, and starting with a shorter end, fold it in three like a business letter.

    Flip the dough over, give it a 90º turn on your work surface, and roll it into an 8x10" rectangle.  Fold it in three again. 

    Wrap it in plastic wrap and chill the dough for at least 30 minute before using. 

    Freeze the dough for prolonged storage, up to 2 months.  To use, thaw in the refrigerator overnight.

    The original recipe calls for 1/2 cup sour cream.  From the reviews I read, some people found it wasn't enough.  It's pretty dry here in Las Vegas, so I did end up adding more.  I would start with the smaller amount and work up to it. 

    I did use a technique I learned from a baking demo instead of kneading the dough.  It involves less direct handling which prevents the warmth of your hands from over-softening the butter which can lessen the flakiness of the dough. 

I now use this technique for all my pie dough and scone recipes or pretty much any dough that you want maximum flakiness.  Here it is:  Dump the dough onto a nonstick rolling mat.  You'll want a good sized one.  Take one side and fold over part of the dough onto itself.  Do this with each side of the mat.  If too dry, add more sour cream to the maximum amount.  After folding over all four sides and the dough is still too crumbly, take a spray bottle and finely spray some water on the dry and crumbly parts and fold over all four sides again.  Now proceed with the rest of the directions.

Now that you have allowed the puff pastry to rest, you are ready to make the twists.  Here is the recipe:  

King Arthur Flour's Flaky Cheese Twists

Ingredients:
·       Fast and Easy Puff Pastry, chilled and ready to roll
·       3/4 (2 5/8 oz.) cup freshly grated Parmesan cheese
·       1 tsp. paprika, for color
·       1/8 tsp. cayenne pepper, optional
·       1 large egg beaten with 1 tbsp. water, for glaze
·       sea salt
Directions:

    Preheat the oven to 400°. Ready a baking sheet by lining with parchment, if you have it; otherwise, just get out a baking sheet, no need to grease it.

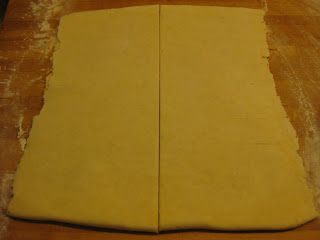
    Place the pastry on a well-floured work surface, and roll it into a 12x24" rectangle, about 1/8" thick.

    Brush some of the beaten egg/water over the dough, saving the remainder for later.

    If you're using the paprika and/or cayenne, mix with the grated cheese. Sprinkle the cheese over half the pastry (12x12" piece of pastry).

    Fold the dough without filling atop the piece with filling, to make a 12" square.


Gently roll till the two halves stick together; you'll now have a rectangle about 12x13".

    Cut the rectangle in half lengthwise to make two rectangles, each 6x13".

    Cut each rectangle crosswise into 3/4"-wide strips; you'll cut about 17 strips from each piece of dough, about 34 strips total.


     Pick up a dough strip and twist each end in opposite directions until the dough is a spiraled cylinder. Place it on the prepared baking sheet. Repeat with the remaining dough strips, leaving about 3/4" between them.

    Brush with the remaining egg wash. Sprinkle very lightly with salt, if desired.

    Bake the twists for 12-15 minutes, until they're golden brown. Remove them from the oven, and cool slightly on a rack before serving.

Servings:  30-34 twists

If you decide to bake all of the twists, you are going to need two baking sheets.  Remember, it's going to make 30-34 twists, so if you are just making them for a few people, freeze half of them.  I wished I did.  To freeze them, lay them on the sheet but just don't worry as much about spacing.  Place in freezer (no need to cover them) and set a timer for 1 hour.  Once time is up, place them in a freezer bag, label it and date it.  When you are ready to use, take out of freezer just before baking.  No need to defrost and baking time may be a minute or two longer.  They should keep 2-3 months depending on your freezer.

The paprika really gives them a beautiful color and the cayenne gives it just a slight zip.  You barely know it's there unless you are extra sensitive.  I like to use sea salt for the final sprinkling because it has a delicate flavor which works out if you have sprinkled a little too much.  

When you are brushing the twists with the egg wash, don't worry about covering every bit of the surface.  You will just end up unraveling them.  Also, when you are twisting, don't worry about it being perfect.  As you see from the pic before baking, mine are kind of misshapen but they bake up beautifully.  

I really hope you try these.  They are so easy and so beautiful.  Everyone will think you are a pro!  Enjoy!


Monday, December 17, 2012

Butter Cut-Out Cookies

For those of you who are looking for that perfect sugar-style cookie dough for cut-outs, this is a great one.  It's easy to handle and tastes great!  I like to use two different snowflake cutters for this recipe and decorate them with royal icing, luster dust and pearls.  It takes a bit of time, but when you see how they turn out, you just might think they are worth it.  Here's some pics:


And here's the recipe:

Butter Cookie Dough
  
Ingredients:

·       2 1/2 cups (12 1/2 oz.) flour
·       3/4 cup (5 1/2 ounces) superfine sugar
·       1/4 tsp. salt
·       16 tbsp. unsalted butter (2 sticks) cut into sixteen 1/2" pieces, at cool room temperature (about 65 degrees)
·       2 tsp. vanilla extract
·       2 tbsp. cream cheese , at room temperature
Directions:

    In bowl of standing mixer fitted with flat beater, mix flour, sugar, and salt on low speed until combined, about 5 seconds. With mixer running on low, add butter 1 piece at a time; continue to mix until mixture looks crumbly and slightly wet, about 1 minute longer. Add vanilla and cream cheese and mix on low until dough just begins to form large clumps, about 30 seconds.

    Remove bowl from mixer; knead dough by hand in bowl for 2 to 3 turns to form large cohesive mass. Turn out dough onto countertop; divide in half, pat into two 4” disks, wrap each in plastic, and refrigerate until they begin to firm up, 20 to 30 minutes. (Can be refrigerated up to 3 days or frozen up to 2 weeks; defrost in refrigerator before using.)

    Adjust oven rack to middle position; heat oven to 375º. Roll out 1 dough disk to even 1/8” thickness between 2 large sheets parchment paper; slide rolled dough on parchment onto baking sheet and chill until firm, about 10 minutes. Meanwhile, repeat with second disk.

    Working with first portion of rolled dough, cut into desired shapes using cookie cutter(s) and place shapes on parchment-lined baking sheet, spacing them about 1 1/2" apart. Bake until light golden brown, about 10 minutes, rotating baking sheet halfway through baking time. Repeat with second portion of rolled dough. (Dough scraps can be patted together, chilled, and re-rolled once.) Cool cookies on wire rack to room temperature.

    If you cannot find superfine sugar, you can obtain a close approximation by processing regular granulated sugar in a food processor for about 20 seconds. If desired, the cookies can be finished with sprinkles or other decorations immediately after glazing. 

As I always recommend, use the best ingredients and you will taste the difference.  I only use King Arthur Flour and real vanilla.  Nielsen-Massey produces high quality vanilla extracts and I would recommend their Madagascar Bourbon vanilla.  Also, if you want a rich butter flavor and texture, DO NOT use cheap butter and if it calls for unsalted, do not use salted!  Cheaper butter adds more water which will make your cookies crumbly and bland.  I typically use Land O Lakes or Challenge.  Tillamook is another good brand.  Sames goes with cream cheese.  Cheaper the brand, more water.   

You might have to search a bit to find superfine sugar.  I use to find it at Albertson's, but the last place I saw it was at Winco's!  C&H makes it and is actually labeled ultrafine.  If you can't find it and have a food processor, you can process regular granulated sugar for 20 seconds as mentioned in the directions.  But measure it for the recipe after you process it.  

You can roll these out about 1/8-1/4" thick.  I like to do 1/4" because it makes it a richer, slightly softer cookie.  If you like the crispness, keep it at 1/8".  To save time during the busy baking season, cut these out and place on parchment paper.  Place on a cookie sheet and freeze for about an hour.  Cut the parchment between each cookie, stack in a bag, seal and freeze until you are ready to bake.  You don't really need to add on to your baking time because they defrost so fast.

The key to nice, crisp cut-out designs is refrigeration between each step.  Do not skip these steps.  Ever make a sugar cookie and it turned into a puffy blob?  That's because it go too soft before you baked it.  Take the time and you will be happy with the results.  

As you can see from the pictures, I frosted them with royal icing.  You can't rush it because it does take time to harden.  I typically do the first layer of frosting and let sit out overnight.  I dust them with luster dust the next day which you can find at most cake shops or even at Michael's.  Just read the label, some colors are not food safe.  I like to use a pearl for snowflakes and silver for stars.  Do your design on top and add pearls if desired or sugar the design.  You will be amazed with the contrast the luster dust gives. Again, allow time to dry.  Enjoy! 

Sunday, December 16, 2012

Lucinda Scala Quinn's Quick Chicken Soup and Rice

This recipe is perfect for this time of year.  It's fast, it's warm, it's delicious and great for when you're feeling under the weather.  And it's really pretty!  There is some ahead time prep because you are making your own chicken stock and shredded chicken.  You can use store-bought chicken stock and chop up a cooked chicken breast, but this way is so much healthier and economical.

To make the chicken stock and shredded chicken, you will need the following:

1 whole chicken, rinsed
1 large onion
Kosher salt
water to cover

Clean the chicken and place in a large pot.  Peel the onion and cut in half and add to pot.  Sprinkle salt to taste over the chicken and cover with water.  Bring to a boil and simmer for 45 minutes.  Remove from heat and allow to sit for about 15 minutes.  Remove chicken from stock and allow to cool some more.  Strain the stock through a fine sieve.  I like to store mine in 4 cup containers that I label and keep in the freezer.  I usually get 12+ cups of stock.  When the chicken is cool enough, shred the chicken.  I usually get about 4 cups of chicken and divvy it up in freezer bags, 2 1-cup bags and 1 2-cup bag.  The stock and chicken will keep in the freezer for about 3 months.  

Now for the chicken soup.  This recipe makes 4 servings, but you can easily double it.  I did just that tonight and after my family was done with it, I might have 1 bowl left over for lunch tomorrow.  Here is the recipe:

Quick Chicken Soup and Rice
  
Ingredients:

·       1 tbsp. olive oil
·       1 tbsp. unsalted butter
·       3 scallions (both white and green parts), thinly sliced
·       1 large carrot, peeled and chopped
·       1/2 cup chopped fresh parsley leaves
·       1 qt. (4 cups) homemade chicken broth or best-quality store-bought chicken broth
·       1 cup cooked, shredded chicken meat (leftover or 1 chicken breast half, sautéed or steamed)
·       1/2 cup cooked rice
·       coarse salt and freshly ground black pepper
Directions:

    Heat a medium-sized soup pot over medium heat and swirl in the olive oil and butter. Sauté the scallions, carrot, and parsley for 2 to 3 minutes. Add the chicken broth and simmer until the carrot is cooked through, about 5 minutes.

    Add the chicken and rice. Heat through completely, about 3 minutes. Taste and season with salt and pepper. Serve immediately.

Servings:  4

You'll want to defrost the chicken stock and shredded chicken ahead of time.  You can do that by putting in the refrigerator overnight or defrost in the microwave.  One thing to pay attention to, the recipe calls for cooked rice.  When I double the batch, I take 1 cup water and bring to a boil.  Add 1/2 cup long-grained rice, cover and reduce to a simmer.  Cook for 15 minutes, remove from heat and let sit for 5 minutes more without removing the cover.  

Don't forget to add salt and pepper to taste before you serve.  I like to use sea salt as a finishing salt.  Enjoy!


Monday, November 19, 2012

Deep Fried Turkey-It's that time of the year again!

I remember the first time I was invited to a party that was serving deep fried turkey.  I told my husband that I thought it was going to be disgusting and that there was no way a turkey could be completely cooked in around 30 minutes or less.  Boy was I wrong.  It was the tastiest, juiciest turkey I had ever had.  From there on I vowed we would make our own deep fried turkey the next Thanksgiving.  Of course, we had to deal with the same skeptical attitudes from family and friends, but they have since been won over.  I know this post will seem a bit long, but once you start the process, you're gonna wish you had all these tips.  It will really save you some grief.

For those who have been wanting to do one of their own, but feel the task may be too daunting, I hope this post will ease your fears.  Yes, it seems a bit scary at first but if you do it the right way you will be greatly rewarded.  The first thing you need to do is buy yourself a deep turkey fryer.  If you want to save yourself some grief when cleaning up afterward, spend a bit more for the stainless steel version.  You will not regret it!  And if it comes with the boiling insert option, get that one.  You won't use that insert for the turkey, but you'll find other ways to use it (look up Low Country Boil).  Next item I recommend, high heat proof gloves.  They will protect whoever is setting the turkey in or lifting it out.  Once you get it, read the directions!  

Next is a VERY IMPORTANT TIP that you must follow!  You know how you hear about all those people who managed to set their houses on fire from deep frying a turkey?  I can almost guarantee you that it happened because they did not do the next three things.  First of all, you need to set up the deep fryer away from the house!  Duh, you think?  But it does happen.  And place on a fire-proof surface that you don't mind getting oil on.  We usually set it on a dirt area.  Secondly, take your turkey in it's original package (we do this the night before) and set it in the pot you will be deep frying it in.  Next, fill the pot with water up to about 5-6" from the top.  Yes, water.  What you are doing is measuring how much oil you will need with the turkey in the pot.  You know, that whole displacement thing and all.  Now, take the turkey out of the pot.  You'll see a big drop in the water level.  Take a black marker and mark a line on the outside of the pot where the water level is now.  When you see on the news a house on fire, this is probably what happened:  The person setting up the fryer probably didn't want to sit out in the cold so they either set it up on a patio, porch or worse, in the garage.  They then pored the oil in so it almost reached the top, heated it up and then dumped the turkey in which was probably still a bit wet.  Remember I said three things?  Thirdly, pat dry the turkey after you are done rinsing it!  What happens next is not pretty.  Most of us should know how real hot oil reacts to cold water being added to it.  It really, really boils over.  Remember when I said the water level really drops when you take the turkey out?  Well, a good amount of really hot oil is now displaced by the turkey and pouring over the side of the pot right into the flame below.  If that person is lucky, it extinguishes the flame but in a lot of cases it doesn't and catches fire and then catches the home on fire.  I hope I haven't scared you off now, but these are the most important facts you should know when deep frying.  We have been doing this twice a year for over 10 years and have never had a fire incident.  But to be safe, keep a fire extinguisher nearby.

What kind of turkey do you need?  This is where you need to read your fryer's directions.  Our fryer can handle a 15 lb. turkey.  You do not want to go over the size recommendation for two reasons:  first, the turkey will not cook evenly and second, do you really want to try wedging in a too big turkey into a too small pot while battling really hot oil?  I didn't think so.  If this is too small for your group, consider this:  remember when I said it could be done in around 30 minutes?  Well you could do two turkeys in half the time it would take to bake one in your home oven.  When you take the first turkey out, just add some more oil to the marked point and bring it up to the right temperature and do your next turkey.  Or if you're like me, you totally fall in love with deep fried turkey and get a second fryer!

Now some people will tell you the turkey won't taste as good because you're missing out on the basting process.  Well, that's just not true because flavoring a deep fried turkey is a two prong attack!  First part of the attack, injecting the flavor.  How do you inject flavor you say?  You buy a marinade that is especially made for injecting into meat.  Yes, you can do this with other meats too!  I have been using Tony Chachere's Injectables for the last few years.  It has a great flavor and is easily found.  When we first started doing this I would have to order the marinade from a catalog every year or not too long after that get it at the local Bass Pro Shops.  Now that this technique has grown in popularity, you can find it in most, if not all grocery stores.  Some brands come with a disposable needle.  I have used both the fancy, high priced, stainless steel needle with multiple holes in the shaft and the disposable ones.  Guess what?  I prefer the cheap version.  The stainless steel injector has a much larger needle which makes it harder for sticking in the turkey and if you happen to be pushing the plunger when lifting it out, you get squirted or whatever is near you does.  We always do two turkeys for Thanksgiving so I flavor one with the roasted garlic and herb version and a Cajun version.  There should be a diagram on the bottle of injectable points.  If not, the directions that come with your deep fryer should have one.  Next step in the flavoring is the rub.  I would say you would want a similar flavor for the rub as the injectable.  Liberally sprinkle the rub onto the turkey and pat into the skin.  When done, wrap it well with plastic wrap and place in refrigerator overnight to marinate.

You may be asking, what kind of oil do I use?  Around the holidays you may have noticed large boxes of oil stacked in the aisles at Sam's Club, Home Depot, Lowe's and now even at the grocery stores.  Those are for the deep fryers.  The most recommended is peanut oil.  It's also the most expensive and if you have someone with nut allergies coming, don't even think about it.  It is the one I use because it gives a bit more flavor.  But if you don't use it, you are just fine.  You'll want a oil with a high flame point so peanut, corn or canola are the only ones you'll want to use.  I do recommend, buy it a few days before the holidays because they do tend to run out quick.  You'll need between 3 1/2-5 gallons  Note:  If your deep fryer did not come with a thermometer, get one!  You'll need a candy/deep fryer thermometer.  That oil needs to be the right temperature!  Also, a meat thermometer will come in handy too.

On the day you are to cook the turkey, you'll need about 30-45 minutes to heat the oil.  Remember when I mentioned what I first thought about deep frying a turkey?  Disgusting and wouldn't be cooked enough?  Here is how it works.  You're gonna want to bring the oil to between 325-350 degrees.  Do not put it in until it reaches that point!  You need it that high because when you set the turkey in, the oil will sear the outside of the turkey sealing it's juices in and keeping the oil out.  Most directions say to cook about 3 minutes per pound.  I have found that's a bit too done for me.  We typically do about 2 minutes.  This is where your meat thermometer comes in real handy.  The temperature should read 170 degrees in the breast and 180 in the thighs.  Most important thing?  Do not leave the fryer unattended!  Although nothing has ever happened to us, my husband never leaves that fryer!

When your turkey is done frying, carefully lift it out and hold it for a moment while the excess oil drains out.  Place it on a rimmed pan and immediately cover with foil and let sit about 20-30 minutes.  The reason for this is when you cook meat, it brings all the juices to the surface of the meat.  When you cut into it early, all those juices drain out leaving the meat dry. If you allow it to rest, the juices start redistributing back into the meat and far less will drain out when cutting.  Now the turkey might seem a bit burnt on the outside.  It's not, that's just the rub reacting to the hot oil especially if you use a Cajun rub which has a lot of red in it.  Now enjoy!

Thursday, October 25, 2012

Apple Caramels


Wow, it's been a long time since my last blog post!  Things have been very busy and maybe my family's protests about having their meals photographed before they could start eating might have somewhat caused the delay.  But, here I am again.  

I go into these cycles where I troll the food blogs, Facebook pages and many other places looking for new recipes.  Then, it seems to be a bit much for me and I kind of take a break for a bit.  Not that I haven't been cooking, but just falling back on the old favorites.  Then I happen to come across a recipe that gets me a little excited.  As simple as this one is, it did just that.

I guess it's the combination of the Fall season, new apple varieties appearing in the grocery store, my friend PJ's search for caramel apples at the store and my need to use that last bit of boiled cider before it expires that got me inspired.  

Once I got a few ingredients from the store that I didn't already have, I was ready to go.  It's not a hard recipe at all, but there are a few items that you really should have before starting.  First thing, a nonstick saucepan.  When dealing with really sticky items which we all know caramel to be, a nonstick pan is a headache preventer.  I love my Pampered Chef Executive 3 quart saucepan for this type of work.  Not only does it have nonstick on the inside, the outside has a nonstick coating!  So easy to wash!  It also has flared rims that make pouring very easy so you don't have to worry about getting some of that scorching hot caramel on you.  Secondly, a candy thermometer.  You can be right at the point you think you need to be and within seconds it can turn ugly!  With the candy thermometer, you can be precise on when you need to remove it from heat.  I ordered mine at King Arthur Flour, but I'm sure you can find one at most cooking stores.  Lastly, a nonstick mat.  You don't have to have one for this, but it sure makes it easy to handle the caramels.  If you do use one, use a silicone knife so you don't cut your mat into shreds.  So let's get on to the recipe!

Challenge Dairy's Apple Caramels
  
Ingredients:
 ·       1/2 cup (1 stick) Danish Creamery Butter
·       1 3/4 cups sugar
·       1/4 cup light corn syrup
·       1/4 tsp. salt
·       1 1/3 cup (14 oz. can) sweetened condensed milk 
·       3/4 cup (6 fl. oz.) frozen apple juice concentrate, thawed
Directions:

    Prepare a 9" square pan by lining it with parchment and spraying with nonstick spray.

    In a heavy nonstick 2-3 quart saucepan, melt butter over medium heat.      Stir in remaining ingredients. 

    Cook over medium heat stirring frequently to prevent scorching. 

    When mixture reaches 248º (firm ball stage), remove from heat.  Pour mixture into prepared pan.  Allow to completely cool.

    Run a thin knife around edges.  Turn candy onto a cutting board sprayed with nonstick spray.

    Cut into 1" pieces.  You can wrap each piece with plastic wrap, waxed paper or cellophane.  Store in airtight container. 

Servings:  130+ pieces

The recipe calls for Challenge Dairy's Danish Creamery Butter.  I couldn't find any at the store, so I used their European Style Butter. Typically, European Style Butter means it is slightly higher in fat than the butter here in the U.S. giving a richer, creamier texture.  Perfect for caramels I thought.  

The other item I changed out was the frozen apple juice concentrate.  I used Wood's Cider Mill Boiled Cider that I get from King Arthur Flour.  They boil down the cider until it becomes a thick, pourable syrup that has a rich, tart apple flavor.  I have been hoarding it for my apple pies, but had just enough left for this recipe!  When I see a recipe on KAF's site that calls for the boiled cider, they usually note that you can used apple juice concentrate in place of the boiled cider using the same amount, so I used 3/4 cup of the boiled cider here.  

While you are cooking up the ingredients, stay close.  The ingredients really start to boil and you'll want to keep stirring to prevent scorching.  Watch that candy thermometer closely so when it gets to 248 degrees, turn off the flame right away.  In preparing my pan, I sprayed it with nonstick spray, put a parchment square on the bottom of the pan and then sprayed that lightly with nonstick spray.  I did not want to have to scrape that puppy out of that pan!  

The recipe calls for you to cut the pieces into 3/4" pieces, which is about 144 pieces.  To me that's too small and too many to wrap so I would recommend 1-1 1/4" pieces.  It also said to wrap them in aluminum foil or waxed paper.  That's a lot of foil and the waxed paper didn't seem like it would stay closed over the candy very well, so I used plastic wrap.  I developed a system, but I think you would all fall asleep reading about it so I'm just going to trust that you all are smart enough to figure out your own system.  

I have to say, they have a nice apple flavor, but not overwhelming.  Thinking of the salted caramel craze that's going on, I did sprinkle a few with Maldon sea salt.  Where it would normally enhance food's flavor, I found that it greatly diminished the apple flavor of the caramels.  Maybe with a regular recipe it would be a good idea, but I don't recommend it for this one.  I am definitely going to add this recipe to my Christmas Gift Basket rotation!  Enjoy!


Monday, March 19, 2012

Hawaiian Grilled Chicken with Hawaiian Plate-Lunch-Style Macaroni Salad


Everyone has their favorite Hawaiian BBQ place.  When I lived in Southern California, Aloha Chicken was the place.  Their chicken was so juicy, the macaroni salad great and they had this amazing dressing on the little green salad that came with it.  I still miss that place.  Here in Vegas, we love L & L.  But these days eating out is getting quite expensive.  So when you can replicate one of your favorite eateries dishes, that is huge!  And here is one of those.  I found this recipe on Pinterest which is a treasure trove of great recipes.  It comes from the blog A Dash of Thyme at http://www.adashofthyme.com/

Hawaiian Grilled Chicken
  
Ingredients:

·       3 lb. boneless, skinless chicken thighs
·       2 cups low sodium soy sauce
·       2 cups water
·       1 1/2 cups brown sugar
·       1 bunch of green onions, chopped (save some for the top)
·       1/4 cup white onion, chopped
·       1/2-1 tsp. minced garlic
·       1 tsp. of sesame oil
·       13.5oz can of coconut milk
Directions:

    Remove visible fat from chicken thighs. 

    Mix soy sauce, water, brown sugar, onions, garlic, sesame oil, and coconut milk in a large bowl. Marinate chicken for at least 4 hours or overnight.

    Drain marinade from chicken and shake off excess onions and garlic.   

    Grill chicken at a low heat so that the marinade does not burn for 5-7 minutes per side or until done.

    Serve with rice or macaroni salad, top with green onion and additional soy sauce.

Servings:  6-8


It's pretty simple to make.  The most work you'll do is chopping the onion and the garlic.  Only use chicken thighs as chicken breasts will not be as tender and juicy.  The recipe calls for a low-sodium soy sauce.  I didn't have any on hand so I used the regular stuff.  I would say if you're trying to cut down on salt, use the low-sodium version.  But if you don't want to pay more for it, you'll be ok with the regular version.    

The recipe calls for you to grill at a low heat.  Don't dismiss this.  The brown sugar in the marinade will burn quickly.  

I am not including Weight Watchers plus points for this recipe because the majority of the ingredients are in the marinade and since the marinade is discarded I don't think the points the WW recipe calculator would give me would be accurate.  

Hawaiian Plate-Lunch-Style Macaroni Salad


Ingredients:

·       1 1b. elbow macaroni
·       1/4 cup finely grated onion
·       2 1/2 cups mayonnaise
·       1 tbsp. vinegar
·       finely grated carrot, to taste
·       pickle relish, to taste
·       salt and pepper, to taste
·       1/4-1/2 tsp. ground allspice
·       paprika, optional
Directions:

Cook macaroni to package directions.  You'll want a soft texture, past al dente.  Drain and rinse with cold water.  Allow to drain completely.  Combine all ingredients.  Stir well and then refrigerate.  You can dress up for serving with a light sprinkling of paprika on top.

Servings:  8

I did a quick search for Hawaiian style macaroni salad and found this one from Hawaiimagazine.com.  They gave two recipes and I added a smidge of two items that were in the second recipe, ground allspice and white vinegar.  

I cooked the macaroni to al dente.  I would recommend going 3-4 minutes past this stage.  It just needs that soft texture.  But be careful.  If you overcook pasta, it just seems to have no flavor at all. Enjoy!